

Contents
|
|
This is a guest post by Michiel Mulders on How To Code a Bitcoin-like Blockchain In JavaScript
The basic concept of a blockchain is quite simple: a distributed database that maintains a continuously growing list of ordered records. Add to this mining, mining rewards and blocks containing transactions. I think you get the general idea of a blockchain, right?
There is nothing better than coding a blockchain yourself to fully grasp the inner workings of a blockchain. This tutorial will explain you to build a blockchain which returns mining rewards. The full code can be found here.
Contents
Project Setup: How To Code a Bitcoin-like Blockchain In JavaScript

As we like simplicity, we will only use three different files:
- app.js: contains the Express API for interacting with our blockchain.
- blockchain.js: contains the classes for constructing our blockchain, blocks, and transactions.
- package.json : contains our installed npm packages.
The most important package we will use is crypto-js. This package contains crypto standards that can be used in JavaScript, like calculating our hash. In my opinion, a hash is the glue between two blocks. A lot of other packages can be found in this package.json file, mainly for compiling JavaScript ES7.
Let’s take a look at the different classes.
Block Structure
A block consists of several properties. First, we pass a timestamp to indicate the moment the block got created. Next parameter is an array of transactions ready to be mined. At last, we define a field that contains the link to the previous block using a hash. This field is optional as the genesis block doesn’t have a predecessor.
class Block {
   constructor(timestamp, transactions, previousHash = '') {
       this.previousHash = previousHash;
       this.timestamp = timestamp;
       this.transactions = transactions;
       this.hash = this.calculateHash();
       this.nonce = 0;
   }
…
}
As you can see, the block contains a hash parameter which will be crucial for our proof-of-work algorithm. A hash can be best described as a function that creates a unique output for an input by performing mathematical operations on the input. Unlike an encryption method, you cannot derive the input based on the output of the hash function. Whenever we find the correct hash for a particular block, it will be stored inside the block as it forms our chain.
The nonce parameter is very important for our proof-of-work algorithm. The chance of finding the correct hash is very low. Each time an incorrect hash has been calculated, the nonce gets increased. Why? If we do not increase this nonce, we will be calculating the same hash over and over again. As we are altering the nonce whenever we find an incorrect hash, we will calculate a different hash each time. This is an intensive calculation (mining) process, and that’s why it’s called proof-of-work.
Block Hash
The hash is calculated using the sha256() functionality offered by the crypto-js package. We simply take the previous hash, timestamp, pending transactions and nonce as input for the creation of a new hash.
calculateHash() {
       return SHA256(this.previousHash + this.timestamp + JSON.stringify(this.transactions) + this.nonce).toString();
   }
Build Blockchain
We are ready to start building our blockchain. Our blockchain is created using an empty constructor. This constructor sets some important parameters like our genesis block, the mining difficulty, any pending transactions and the mining reward for mining a new block. We will explain the exact use of the mining difficulty later in this article.
class Blockchain{
   constructor(genesisNode) {
     this.chain = [this.createGenesisBlock()];
     this.nodes = [+genesisNode]
     this.difficulty = 4;
     this.pendingTransactions = [];
     this.miningReward = 100;
   }
 …
}
Our blockchain needs to be instantiated with a first block, called a genesis block. This block consists of the actual date, an empty array of transactions and a null reference to the previous hash parameter.
createGenesisBlock() {
    return new Block(Date.parse("2018-03-13"), [], "0");
}
This .nodes parameter will contain all active nodes in our decentralized network. It’s an important property as we will use this to broadcast newly mined blocks to other nodes. It can be compared with a very simple gossip protocol implementation.
Get Latest Block
Retrieving the latest block is as simple as taking the last element from our chain array.
getLatestBlock() {
    return this.chain[this.chain.length - 1];
}
This function will be used later on to retrieve the hash of the latest block to be included in the block that is ready to be mined and added to the chain.
Transaction Structure
Our transaction class simply consists of following fields:
- fromAddress: The address from which you are sending coins.
- toAddress: The receiving address.
- Amount: Amount of coins we want to transfer.
class Transaction{
   constructor(fromAddress, toAddress, amount){
       this.fromAddress = fromAddress;
       this.toAddress = toAddress;
       this.amount = amount;
   }
}
Adding Transactions and Mining Blocks
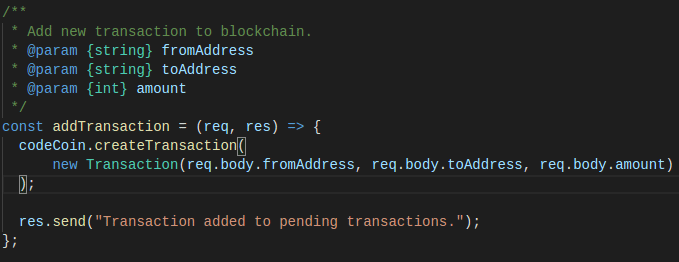
If we want to include a transaction in a block, we can add this one to the pendingTransactions array of our blockchain. We use a function called createTransaction which accepts a transaction object.
createTransaction(transaction){
   this.pendingTransactions.push(transaction);
}
Now, it gets interesting as we are ready to mine our newly created block. To understand the mining process, we will explain you the use of the ‘difficulty’ property. If we wouldn’t define a mining difficulty, the whole process of creating a hash (mining) would be done within a couple of milliseconds, completely undermining the concept of proof-of-work.
In our example, we set a mining difficulty of two. This means we want to find a hash that starts with two 0’s. In fact, it’s not restricted to 0’s. If you want addresses that start with ‘aa’ or ‘xx’ that’s all possible. The chance of finding a hash that starts with two 0’s is far less than finding one with just one zero or none. As you can see, the higher the difficulty, the lower the chance of finding the correct hash and the longer it takes to find it.
mineBlock(difficulty) {
       while (this.hash.substring(0, difficulty) !== Array(difficulty + 1).join("0")) {
           this.nonce++;
           this.hash = this.calculateHash();
       }

       console.log("BLOCK MINED: " + this.hash);
   }
The piece of code: Array(difficulty + 1).join(“0”) will first create an array with 3 (2 + 1) empty slots. Next, we call the join function on the array and tell it to paste a ‘0’ between each empty slot giving us a string with two zeros ‘00’.
We use a while loop here to check the hash for two zeros. If it doesn’t start with two zeros, we increase the nonce and recalculate the hash until we have found a matching hash.
In our blockchain class, we define a minePendingTransactions function that will create a new block using the pending transactions. Next, we mine the block and add it to our chain. As we want to imitate the Bitcoin network, you can pass a mining reward that the miner will receive for finding the correct hash.
minePendingTransactions(miningRewardAddress){
       let block = new Block(Date.now(), this.pendingTransactions, this.getLatestBlock().hash);
       block.mineBlock(this.difficulty);

       console.log('Block successfully mined!');
       this.chain.push(block);

       this.pendingTransactions = [
           new Transaction(null, miningRewardAddress, this.miningReward)
       ];
   }
The miner won’t receive the reward immediately. This reward is considered to be a transaction and will be included in the pending transactions array for the next block. So, when the next block is mined, the miner will receive his reward.
Validate the Blockchain
This is just a demonstrative function to calculate the validity of our blockchain. We start at the genesis block and follow all links/hashes until we reach the last block. There are two scenarios in which our blockchain ends up being invalid:
- The calculated hash of a block is not equal to the hash included in the block.
- The previousHash property of the current block doesn’t point to the hash of the previous block.
isChainValid() {
       for (let i = 1; i < this.chain.length; i++){
           const currentBlock = this.chain[i];
           const previousBlock = this.chain[i - 1];

           if (currentBlock.hash !== currentBlock.calculateHash()) {
               return false;
           }

           if (currentBlock.previousHash !== previousBlock.hash) {
               return false;
           }
       }

       return true;
   }
Retrieving Balance
A balance for a particular account can be retrieved by looking at all transactions and finding the ones related to that account. The balance can be retrieved by making the sum of all incoming and outgoing transactions.
getBalanceOfAddress(address){
       let balance = 0;

       for(const block of this.chain){
           for(const trans of block.transactions){
               if(trans.fromAddress === address){
                   balance -= trans.amount;
               }

               if(trans.toAddress === address){
                   balance += trans.amount;
               }
           }
       }

       return balance;
   }
Exploring Our Blockchain API
The API is a little bit too complex to describe in detail. We will explain what’s behind the different API routes.
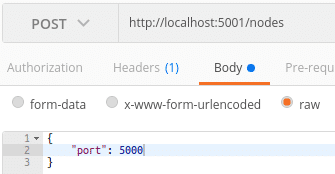
As we haven’t implemented a gossip protocol, we have to register nodes manually when we add one to the network. The POST route /nodes accept an integer that represents the port number of your blockchain.
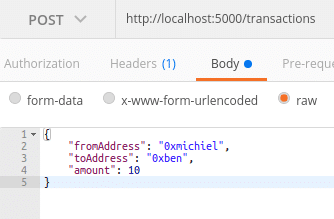
After registering a node, we can start adding transactions with the POST /transactions endpoint. This endpoint expects three parameters:
- {string} fromAddress: Address from which you are sending codeCoins to somebody else.
- {string} toAddress: Receiver of codeCoins.
- {int} amount: Transferred amount of Codecoins.
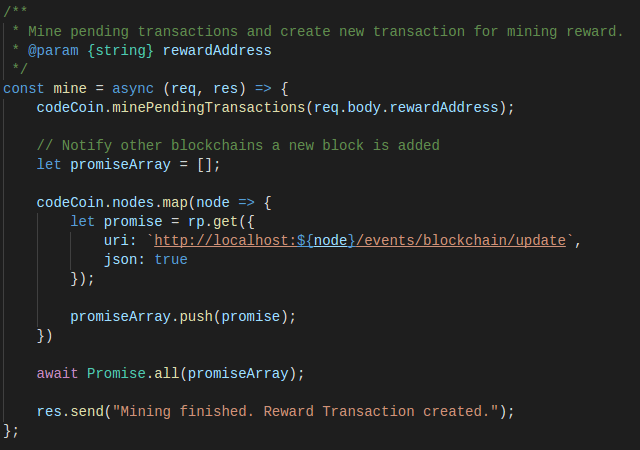
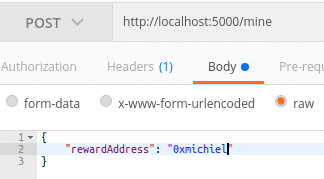
Now we have some transactions, we can mine our block including the pending transactions. Endpoint POST /mine allows us to do so. It will trigger the mining function on our blockchain and find the correct hash. Don’t forget to add the rewardAddress parameter in the body of the request as each miner gets 100 codeCoins as a reward for mining a new block.
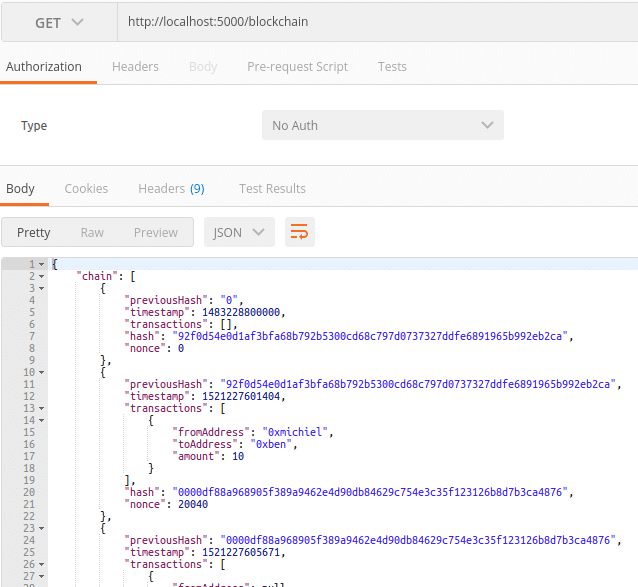
In addition, the function will send an event to all other nodes in the network about the addition of a new block. The other nodes will retrieve the new blockchain via GET /blockchain.
A route called GET /blockchain/resolve has been added as well for newly added nodes to find the longest chain and retrieve it. This can be seen as the synchronization process between nodes.
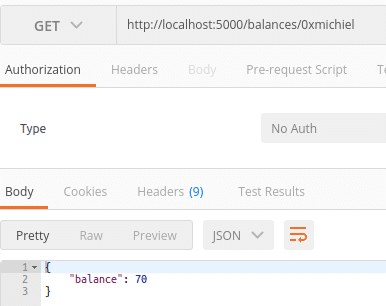
At last, we all want to know how rich we are. The GET /balances/:address endpoint returns how much codeCoins you have.
Testing the Blockchain via API
Let’s spin up two instances of our blockchain on port 5000 and 5001. Open two terminals and execute the start command. We add an extra environment variable to tell the start command on which port it has to run.
PORT=<port-number> npm start
Ok, now we have two nodes. We have to make both nodes aware of each other’s existence. We will use Postman for sending these request, you can use whatever tool you prefer. A small remark, don’t forget to add a header to tell the server we will send JSON objects: Content-Type -> application/json.
Let’s make node 5000 aware of node 5001. After that, send the exact opposite request as you can see in the image.
Now, let’s add one or more transactions like this:
At last, we want to mine a new block.
Print the actual blockchain:
To finish this tutorial, let’s query for my codeCoin balance:
The full code can be found here.
I want to thank Savjee for making this article possible.


Hi Michiel I am a omplete novice to coding but need to look at blokchain code for a college project. I see your code files in Github but what do I need to do to set up the code. Do I initilly open Yarn or postman would it be possible for you to set out a step by step so I can try and run the code.
Appreciate any help you could provide
It works. Thanks for briefing the proof-of-work concept and blockchain publishing between nodes in such straightforward JS codes.
One suggestion, could you please make it a bit clearer that the statements “The full code can be found here.” in your first paragraph is actually pointing to a probably old version of the project?
I downloaded it at first and was a bit confused about what you are talking about in the later sections. In the end, I realized that there is another complete version at the end that does work! But overall, it’s a successful tutorial. I like it.
Hi Avarmaavarma
I think you are wrong. Did you take a look at the Youtube tutorial code and my code?
The code for writing a Bitcoin-like blockchain will mostly be the same. You need a nonce, hash, amount, address, etc. The tutorial you are speeking about is absolutely different from my code. It is just a concept that gives you an idea of how it works.
I crafted a full example that serves an API and can spawn multiple nodes. Whenever you mine a block, other nodes will be updated with the new block. Take a look at the code and see what’s different. It’s so much more than Savjee his example. You are right about the fact that the code is built with Savjee his code in my mind. That’s as well the reason I’ve asked his permission to use the code as a base for my blockchain example (as it’s very general) and have built on top of it.
I hope this makes things more clear.